Tutor CTF: art_assignment
 Kevin Zhu
Contest Source: COMP6[84]41 CTF
Note that all flags have been replaced with “COMP6841{REDACTED}”. This is to discourage you from just blindly submitting the final answer, and to encourage you to follow along and learn something along the way.
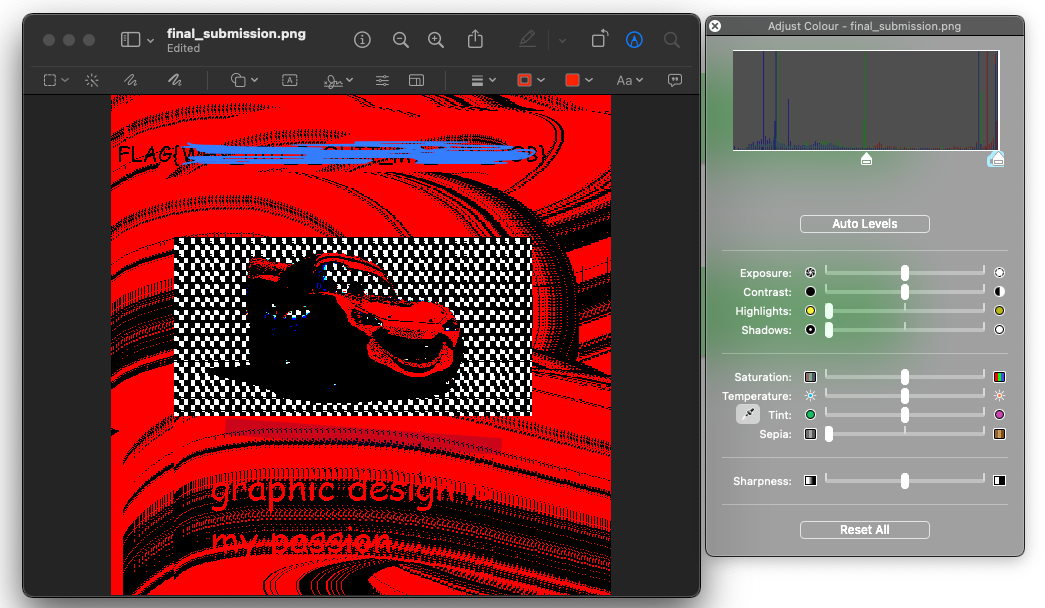
We are given a very well designed graphic featuring out favourite lightning themed racing car: Lightning McQueen. Here’s a little sneak peak:

We’ve been told that there’s a message hidden in here. There’s two pretty common options when it comes to hiding messages in images: Either look into the file metadata, or LSB steganography. Let’s check them both out!
Checking File Metadata
Starting off with file metadata…
$ exiftool final_submission.png
ExifTool Version Number         : 11.88
File Name                       : final_submission.png
Directory                       : .
File Size                       : 5.8 kB
File Modification Date/Time     : 2022:04:06 16:01:32+00:00
File Access Date/Time           : 2022:04:06 16:17:18+00:00
File Inode Change Date/Time     : 2022:04:06 16:01:32+00:00
File Permissions                : rw-rw-r--
File Type                       : PNG
File Type Extension             : png
MIME Type                       : image/png
Image Width                     : 500
Image Height                    : 500
Bit Depth                       : 8
Color Type                      : RGB with Alpha
Compression                     : Deflate/Inflate
Filter                          : Adaptive
Interlace                       : Noninterlaced
SRGB Rendering                  : Perceptual
Exif Byte Order                 : Big-endian (Motorola, MM)
Orientation                     : Horizontal (normal)
Color Space                     : sRGB
Exif Image Width                : 500
Exif Image Height               : 500
XMP Toolkit                     : XMP Core 6.0.0
Image Size                      : 500x500
Megapixels                      : 0.250
Looks pretty normal. The date time givne to us indicates the time that I downloaded the file, so nothing too significant here.
LSB
Next let’s consider LSB steganography. LSB stands for Least Significant Bit, and its a method to hide information within another image. The idea is that for every pixel, changing the least significant bit has almost no affect on the final image (at least to the human eye). Hence, we can use that final bit to encode secret information in the image.
One really easy way to check for this is to simply modify the levels of the image. On Mac (which is what I’m using), the Preview app supports this feature by default. Here’s what it normally looks like:
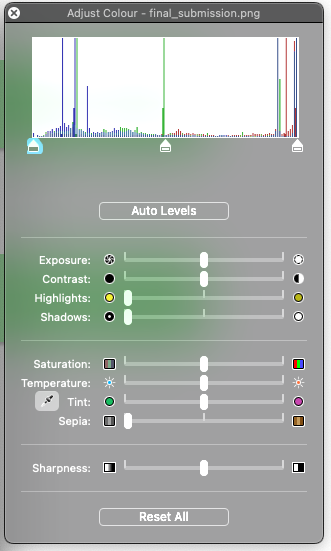
The x-axis represents the overall brightness, and the coloured spikes represent how much of that colour exists at that particular brightness. For example, we can see that the blues are normally at their lowest values.
Also on the bottom, we can see a few pointers. This allows us to modify the input range of these colours. In other words, if we drag the bottom (black) slider to the right a little bit, everything below the slider becomes black, and everything in the range between the black and white slider now becomes “expands” to fill out the originla range of black to white. In other words, the image becomes darker overall.
What we can do with this is to drag the black slider all the way over until it’s almost overlapping with the white slider. This has the effect of darkening most of the image, but then really finding contrast in those tiny alterations in the brighter parts. At this point, even the least significant bits start to matter, which mean that the hidden message is revealed. Here’s what it looks like if we do it for this image (censored, for educational reasons):